What is Chameleon Paint and How Does It Work?
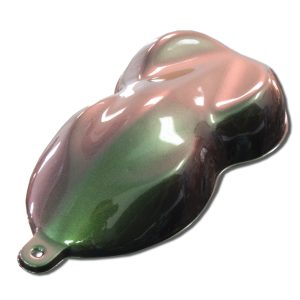
Chameleon paints appear to change color depending on the viewing angle. They are sometimes referred to as "color-changing paints" or "flip paints."
- Sale!

KonFusion Hole Shot Chameleon Auto Paint
From: Original price was: $139.00.$100.00Current price is: $100.00. Select options - Sale!
KonFusion Tropical Storm Chameleon Auto Paint
From: Original price was: $139.00.$100.00Current price is: $100.00. Select options - Sale!
Mountain Fall Chameleon Auto Paint
From: Original price was: $139.00.$100.00Current price is: $100.00. Select options - Sale!

Nuclear Gold Chameleon Auto Paint
From: Original price was: $139.00.$100.00Current price is: $100.00. Select options - Sale!
Ocean’s Rip Chameleon Auto Paint
From: Original price was: $139.00.$100.00Current price is: $100.00. Select options - Sale!
Psychotic Illusions Chameleon Auto Paint
From: Original price was: $139.00.$100.00Current price is: $100.00. Select options - Sale!
Storm Surge Chameleon Auto Paint
From: Original price was: $139.00.$100.00Current price is: $100.00. Select options - Sale!

Tokyo Drift Chameleon Auto Paint
From: Original price was: $139.00.$100.00Current price is: $100.00. Select options - Sale!
Toxic Tide Chameleon Auto Paint
From: Original price was: $139.00.$100.00Current price is: $100.00. Select options
Chameleon Paint Explained
 Chameleon paint - and the technology behind it - is used in everything from automotive coatings to decorative household products to currency security markers.
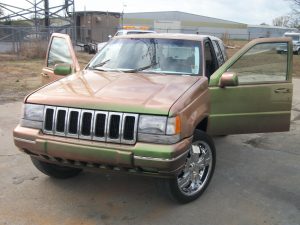
In the auto industry, chameleon paints have been popular with vehicle customizers, and have even been offered on new vehicles.
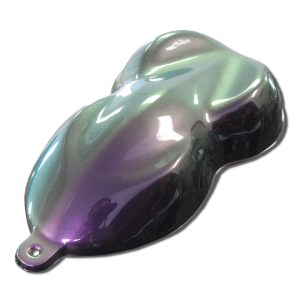
Chameleon paint is made from a highly specialized pearl pigment that separates light into many of its individual components:
- Depending on the special metal treatment on the chameleon pearl pigment, different color effects are attained
- Chameleon paints are applied in three stages: a dark base, then a semi-transparent chameleon paint layer, and finally clear coat
- The specialized pearl pigment that makes chameleon possible used to be incredibly expensive, but the price has come down over time
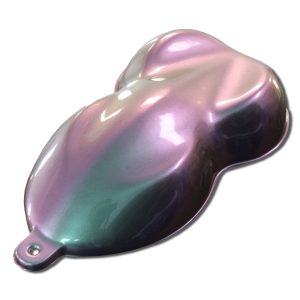
In terms of the base coat, black does not have to be used - any dark base coat will allow the chameleon effect to be visible. However, black bases are almost always used since they provide the highest absorption, maximizing the color effect in the chameleon paint layer.
Lighter colored base coat colors allow more light to be reflected back up and through the chameleon layer, which tends to overpower the chameleon effect and sort of "hide" it. However, some professional painters have taken advantage of this effect, using it to create "ghost graphics."
OEM Chameleon Paint
While chameleon paints have seen significant use in custom painting, they haven't been a common OEM paint color. The combination of higher costs, non-traditional colors, and high repair costs has discouraged automakers from using chameleon. As the price has come down, chameleon colors are starting to find their way into OEM applications.
Still, some brand new vehicles have been offered with chameleon paint. Ford has offered this paint on two versions of the Mustang Cobra, and Porsche evidently offers chameleon paint options as part of their customization program.
How Much Does A Chameleon Paint Job Cost?
Paint jobs have two main costs - the materials (including paint), and the painter's labor. It's safe to say that you want to hire an experienced painter to apply chameleon paint to your vehicle, so you're going to spend several thousand dollars to work with a good pro. We've heard of some chameleon paint jobs costing as much as $10,000.
However, one area you can save is on the chameleon paint itself. Many companies sell chameleon paint for thousands of dollars, but not us. Our paints are affordable because we are the official retailer of UreChem Paints, a US paint manufacturer. We can offer chameleon paint for as little as $500, depending on activators, reducers, and clearcoats you choose. These savings can reduce the total cost of the paint job by thousands.
A Note About Chameleon Paint Colors
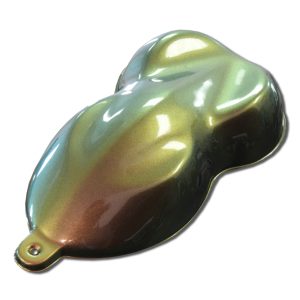
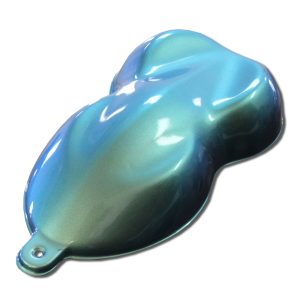
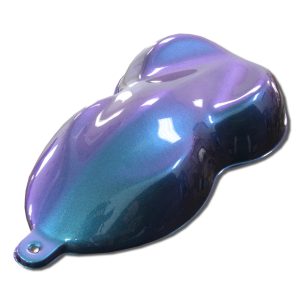
We offer several different chameleon paint colors, and of course the final color varies greatly depending on the pigment used, application technique, and the color of the opaque base coat beneath. The color "sets" or groups of distinct color a chameleon paint color might display vary so greatly it is impossible to summarize what is widely available.
We encourage customers to judge their favorites based on videos of actual cars and bikes painted with a particular chameleon paint. Judging color by names is a poor practice as very often one person will see and name a color very different than the next.
How To Apply Chameleon Automotive Paint
Due to the transparent nature of the chameleon layer, applying chameleon paints is typically more challenging than applying normal automotive paints:
- Any variation in spray patterns can lead to a thicker or thinner film in a given area
- Since the chameleon layer is transparent, variations in thickness will create a different color in that area
- Thick or thin areas typically manifest as light and dark spots, and are sometimes called "blotching" or "mottling"
Streaking is another common spray defect we see in chameleon finishes. Streaking is caused by poor atomization from the gun nozzle, or holding the gun too close to the painted surface (chameleon paint needs time to spread and separate before it hits the surface).
Chameleon Application Tips
To avoid problems with chameleon paint application, start by making sure the paint gun is clean and functioning properly by doing test strokes over a dark surface.
In terms of paint gun settings, there are too many different types of spray guns used in the application of automotive paints for us to cover all the potential set up scenarios. However, we can however give a good starting point for you to try some experiments on your own:
- Follow your gun manufacturers recommendation on inlet pressure, but start with the higher side of the recommendation.
- If your gun has an air adjusting knob, make sure the knob is all the way open. You can tell this as it will be the setting that makes the most air come through the gun.
- Next, screw the fluid adjustment (usually at the back of your gun's needle) all the way (clockwise) until it stops with light hand pressure. Make a mark on the knob to indicate the zero fluid position then rotate the knob counter clockwise one and 3/4 turns.
- Adjust your fan to 10 inches wide when held 10 inches from the panel you are painting.
- For application, you want to overlap your last stroke by 80% which means on a 10 inch pattern you should only move down 2 inches every stroke. The overlap is critical when painting transparent finishes like chameleon paints.
At this point, you should experiment with test sprays and adjusting your gun settings until you are confident you are laying it even and consistent.
NOTE: One of the biggest mistakes we see people make is doing 50%-60% overlap thinking they are making 75%.
Another common mistake we see is people not "walking the sides" of the vehicle and crosshatching a spray at the door seems. By stopping and starting mid panel (which is common with typical auto paints), you create a light and heavy area where you overlap as you move down the vehicle. This will typically result in light and dark areas it must be avoided.
TIP: Don't start a pattern in the middle of the hood, deck lid, or top. Start on one side then work it all the way across to the other side. You do have to be careful when reach across wet paint but when done properly this method prevents the "skunk stripe" you sometimes see in the center of hoods etc.
Finally, we recommend restricting the fluid flow and applying the product very lightly on the first coat. You have to take great care on the first coat since mistakes in that layer can be hard to fix in subsequent coats. Some people find it easier to mix our KonFusion chameleon colors 1:1 with reducer on the first coat so there is more margin for error.